Mobile Repair Basics: 10 Powerful Tips Every Smart Beginner Should Know (2025 Ultimate Guide) mobile repair basics 🔧 Introduction In today’s digital world, mobile phones have become a lifeline for communication, work, and entertainment. With millions of devices in use, the demand for mobile repair technicians is growing rapidly. If you're someone who loves technology or wants to start a new career, understanding mobile repair basics is the first step on your journey. Mobile repair basics cover everything from identifying phone components to safely opening a smartphone and diagnosing common issues. These foundational skills are essential whether you want to repair phones professionally or just fix your own. Without a strong grip on the basics, even experienced technicians can struggle with complicated repairs. One of the best things about learning mobile repair basics is that you don’t need a fancy degree or expensive equipment to get started. All you need...
Get link
Facebook
X
Pinterest
Email
Other Apps
Complete Guide to CRT TV Fault Diagnosis and Repair
Get link
Facebook
X
Pinterest
Email
Other Apps
-
Complete Guide to CRT TV Fault Diagnosis and Repair.
Introduction
CRT TVs, though older technology, are still in use in many households. Diagnosing and repairing these TVs requires a systematic approach to identify and fix faults effectively. In this guide, we will walk through a structured process to diagnose and repair common CRT TV issues.
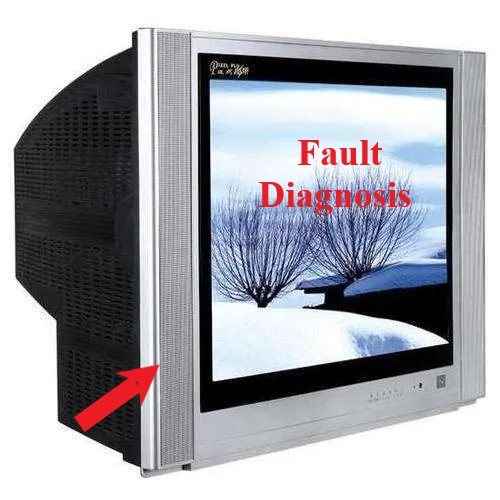
CRT TV fault diagnosis
1. Safety Precautions Before Repair
1. Safety Precautions Before Repair
Unplug the TV and discharge the CRT to prevent electric shock.
Wear insulated gloves and use a grounding wrist strap.
Keep a multimeter and necessary repair tools ready.
Be cautious of high-voltage components like the flyback transformer.
Avoid touching soldered joints when the TV is plugged in.
Work in a well-lit and ventilated area to avoid inhaling fumes from soldering.
Check for any burnt components before proceeding with repairs.
2. Checking the Power Supply
Symptom: No power, LED not blinking.
Solution: Inspect the fuse, power cord, and mainboard for damages.
Use a multimeter to check voltages at key points.
Examine power supply capacitors for bulging or leaks.
Symptom: Color distortion, missing red/green/blue.
Solution: Adjust the screen potentiometer or check for faulty video ICs.
Inspect the neck board for cold solder joints.
Demagnetize the screen using a degaussing coil if colors appear distorted.
Check for loose or damaged color control circuits.
Replace faulty RGB amplifier transistors if necessary.
5. Troubleshooting Sound Problems
Symptom: No sound or distorted audio.
Solution: Test speaker connections and audio ICs.
Check for loose wiring and defective capacitors in the audio section.
Adjust the volume control potentiometer if necessary.
Verify if the mute function is activated via the remote or settings.
Inspect audio signal pathways for damage or corrosion.
6. Horizontal and Vertical Deflection Problems
Symptom: Picture too narrow, wide, or wavy.
Solution: Inspect horizontal and vertical ICs for damage.
Replace faulty yoke coils or deflection transistors.
Adjust horizontal and vertical hold settings.
Examine deflection circuits for broken traces or loose connections.
Replace any defective diodes in the deflection section.
7. CRT TV Auto Shutdown Fix
Symptom: TV turns off randomly.
Solution: Check for overheating components and dry solder joints.
Inspect the flyback transformer and replace if necessary.
Ensure proper ventilation and clean any dust buildup.
Test voltage regulators for instability or overheating.
Check power-on reset circuits for faulty behavior.
8. High Voltage and Flyback Transformer Issues
Symptom: TV makes a high-pitched noise or sparks.
Solution: Replace the flyback transformer and check the EHT section.
Test the anode cap and ensure a proper connection.
Look for arcing points around the flyback transformer.
Inspect surrounding components for carbon tracking or burns.
Use insulation coating spray to seal minor arcing areas.
9. EEPROM and Microcontroller Problems
Symptom: TV settings not saving or erratic behavior.
Solution: Reprogram or replace the EEPROM IC.
Test the microcontroller and verify clock signal operation.
Inspect for corroded IC legs and clean them if needed.
Reset the TV settings to factory default to rule out software corruption.
Check for cold solder joints on EEPROM connections.
10. Final Testing and Calibration
Reassemble the TV and ensure all issues are resolved.
Adjust color balance, screen focus, and sound output.
Perform a burn-in test to confirm stability over time.
Test with different input sources to verify performance.
Measure power consumption to detect abnormal current draw.
Ensure all safety shields and grounding points are secured.
Conclusion
CRT TV fault diagnosis is crucial for effective CRT TV repair. By following these 10 steps, you can successfully fix most common CRT TV problems. Regular CRT TV repair and careful handling can significantly extend the life of your CRT TV. Always document your CRT TV fault diagnosis and repairs to help in future troubleshooting.
How to Repair 220V AC to 5V DC SMPS Power Supply Easily – Complete 2025 Guide SMPS Repair • 2025 Updated How to Repair 220V AC to 5V DC SMPS Power Supply Easily – Complete 2025 Guide In this detailed guide, you will learn how a 220V AC to 5V DC SMPS power supply works and how to repair it step by step. We will cover safety rules, internal blocks, every important component, and a practical troubleshooting flow used by professional technicians. 🔧 Skill Level: Beginner to Intermediate ⚡ Input: 220V AC • Output: 5V DC SMPS 📅 Updated for: 2025 Quick Navigation Table of Contents 1. Introduction: What Is a 220V AC to 5V DC SMPS? 2. Safety First: High Voltage Precautions 3. Tools and Basic Skills You Need...
How to Assemble a 5.1 Amplifier Easily (2025 Full Guide) | Tamil Technicians English How to Assemble a 5.1 Amplifier Easily – Complete 2025 Guide Want to build your own 5.1 home theater amplifier at home or in your small workshop? In this Tamil Technicians guide we will see what components you really need, how to wire everything safely, how to choose the correct speakers and ohms, and how to remove hum and noise like a pro. DIY Audio Repair Beginner + Technician Friendly Updated for 2025 Many technicians and hobbyists love to assemble an amplifier, but get confused when it comes to 5.1 systems – there are more channels, more wires and more chances for ...
Fix Low or Distorted Audio in CRT TVs – Ultimate Troubleshooting Guide Introduction Having trouble with low or distorted audio in CRT TVs ? This issue can be frustrating, but don’t worry! Audio problems in CRT TVs are common, especially in older models that have been in use for several years. Poor sound quality can result from various factors, including damaged components, improper settings, or electrical issues. Identifying the root cause is crucial for an effective fix. Fortunately, many of these problems can be resolved with simple troubleshooting techniques that don’t require advanced technical knowledge. A CRT TV’s sound system is not as sophisticated as modern flat-screen TVs, but it is still designed to produce clear audio. If you notice distortion, muffled sounds, or extremely low volume, your TV may be suffering from a technical issue. This could be due to internal components failing over time, interference from nearby devices, or simple misconfigurations in...



Comments
Post a Comment